
By Francisco Dean
In this 3-part series, Francisco Dean, a high school music teacher at the University of Chicago Laboratory Schools, talks about the merits of music technology offerings as a means to reach students that would otherwise not pass through the doors of a music classroom and how offerings like this add valuable diversity to school music departments in general. Part One: Who, What, Why (Fall 2019 issue) explored the rationale behind the addition of a digital music offering. Part Two: Strategies & Planning (Winter 2019 issue), showed how to start a digital music program. Here in Part Three, we now focus on a curriculum that ties it all together, with ideas for scope-and-sequence, and abundant resources for support.
Originally published in the Spring 2020 Illinois Music Educator Journal
A curriculum of song writing/composing includes music theory elements such as chords, progressions, scales, etc. There is an abundance of resources available to approach these topics in a way that caters to a wealth of teaching styles, and so this article will not dictate to you how to administer those elements. For this article, I will focus on the resources related to learning digital music production and a process for shaping the creative work, and you’ll be able to apply this curriculum to any digital audio software (DAW) you choose.
RESOURCES FOR LEARNING
Learning resources generally fall into two categories: paid and free. These resources are universal to all digital music software.
Paid resources include subscription-based websites with libraries of training video tutorials for various DAWs. My favorites are Linkedin Learning (formerly Lynda), AskVideo and Groove3.com. All three provide an extensive library of tutorials covering various topics, beginner through advanced. It is worth noting that Linkedin and AskVideo are not just for music. These sites include many non-music tutorials such as word processing, spreadsheet, graphic design, photo/video editing, etc., possibly enticing your administration to consider a site license for the entire school.
With free resources, I’ve found three to be helpful: YouTube, internet forums and social media groups. Here, vast communities of experienced users share their time and talents to help others, and represent users from all skill levels. Results can vary, as all purport to be experts, but you will always get a collection of contributions from a number of experienced users, and it becomes easier to detect the ones that are helping you the most. Facebook groups that I find extremely useful include I Teach Music Technology!, Ableton Music Educator Community, and Hey Audio Student.
CURRICULUM
This is a broad overview of some key components in my curriculum, so please reach out if you’d like to know more and go deeper.
FIRST THINGS FIRST
It is time to shift gears - traditional notation is not the way we work with digital music. This can be a good thing, because some students do not read music, but have just as much musical passion as those who do. Digital music exists in a way that accommodates all.
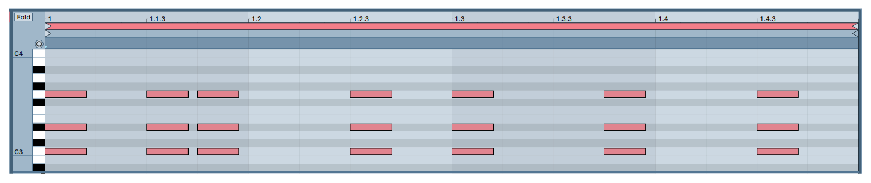
Digital music exists in two formats: Audio waveforms and MIDI data. Audio is recorded material (a sample, or recording of a vocal or acoustic instrument, for example) and MIDI is the graphical representation of musical notes and rhythms. All MIDI notes are written on a grid that appears like a piano roll… even drum parts. Notes are represented vertically on this grid, while rhythmic duration of these notes is represented horizontally. The transition seems strange at first, but one quickly picks up on the concept.

JUMPING IN
You can start your courses with teaching music theory or integrate it throughout, but nothing happens in digital music until you teach the software. You don’t have to know or cover every aspect; start with the essentials. Project-based learning works great and the software you choose might have embedded tutorials. You can also find abundant 3rd party lesson plans created by other educators from the resources I mentioned earlier. My Navigating the Software unit I begin with includes 4 areas:
Walking through the essential features and controls of the software and working with pre-existing material (audio loops, for example)
Using the software to create drum beats
Accessing and using software instruments and built-in sounds
Using the software to record audio
While teaching this, I also introduce some basic theory concepts, but in order to accommodate all students, my curriculum uses no traditional music notation. I teach scale and chord building through intervals rather than key signatures because the focus in this class is on creativity through technology. You know, of course, The Beatles, Jimi Hendrix or Elvis Presley - tremendous music has been, and will still be created without reading music.
My curriculum is designed by working backwards from the final student project, which incorporates all concepts covered in the year. Depending on your students’ grade level, you can achieve this through pre-made material, their originally composed material or a combination. I use what I call “construction kits”, folders of various audio loops all designed to work together, that I share with my students. Drum, bass, chord, melody and even special effects loops are all pre-made with the same tempo, key, and style so that they can be interchanged in any way. They also illuminate how various instrument parts are created. How do you write a funk bass part, or Hip-Hop drums? Grab a construction kit for the style you like and study it.
Loops also provide ways to experiment with song form to make complete arrangements. They show how separate parts can coexist with each other, and provide great examples to guide students when choosing their own instrument sounds for their projects.
INSTRUMENT PART CREATION
It’s worth noting here that when I cover the part-writing units below, the students complete these units as exercises only. The focus is the nuts and bolts of how to write for each part, and we don’t talk about song form or creative inspiration for a larger work until afterwards. Each unit is an 8-bar exercise based on a groove and a chord progression, and the individual parts get assembled in a way that become playable as one.
Writing for Drums
Most basic grooves only require a kick drum (bass drum), snare drum, and hi-hat or ride cymbal. Studying recordings from various genres reveals that most drum parts are simple and repetitive. There are many drum encyclopedia books that show these grooves using traditional music notation, and some that show these grooves in MIDI notation. I encourage students to add slight variations for a more humanized beat, but I caution them that too much variation can clutter the original beat!

Chord Progressions
Before covering bass, harmony and melody writing, I stress the utmost importance of choosing a chord progression first. Students can borrow from pre-existing songs or build their own. There is an excellent online resource known as Chord Maps for both major and minor keys. Check out www.mugglinworks.com/chordmaps. Once a progression is created, it is important to then stress the importance of all tonal parts adhering to this.
Writing for Bass
Next, I discuss the role of the bass and listen to examples of bass parts in a variety of songs. Like drums, bass parts are simple and repetitive. The unit on bass follows immediately after drums to show the connection the two parts have with each other. I also teach writing in what we call Levels. A Level One bass part uses only root notes, Level Two uses the roots in various octaves, and Level Three adds the 5th, and so on with an increasing number of options and notes to use.
Harmony Parts I teach harmony in three different forms:
Pads – long sustained chords that provide a backdrop.

Writing Harmony Parts - Pads
Comping – Chords that are given rhythms that compliment the overall genre/style.
Writing Harmony Parts - Comping
Arpeggiation – Broken chords that have a melodic implication while also implying harmony because their pitches are based solely on chord tones.

Writing Harmony Parts - Arpeggiation
The interesting thing here is that all three approaches to writing harmony parts can coexist when different instrument sounds are applied. Additionally, different sections of the song can add or subtract any of these three techniques for added interest and contrast.
Chord/Scale Relationship
The bass and harmony parts represent the backdrop of a song, and the melody represents the centerpiece. Before introducing melody, I show the relationships between chords and scales, since scales will be the source for melodies. One great free resource for this is the Scale Syllabus, from Jamey Aebersold’s Jazz Handbook (a free online pdf at www.jazzbooks.com). The handbook is geared towards jazz, but his Scale Syllabus is not, and can be applied to any genre.
Writing Melodies
To start, it’s important to clarify the difference between a true melody vs a melodic fragment (which many incorrectly assume is a true melody). The following guidelines can have exceptions, but I teach that a good melody has the following characteristics:
Rhythmically simple
Typically 8 bars long, broken into complementing 4-bar phrases
Stays within an octave and a half range
Mostly smaller step-wise intervals (fewer large interval jumps)
Contains an overall natural shape/contour
Melodic fragments are shorter (usually 1 bar), repetitive, and have little shape. The idea is that a true melody should be simple enough that it becomes memorable. Repetition can be used, but not overdone (at the risk of becoming a melodic fragment instead of a true melody). Playing examples of just about any pop hit with vocals from just about any decade will provide dozens of great examples of well-written melodies.
Bells & Whistles
Drums, bass, harmony, and melody form the core of a work. As a final touch, I introduce things that can add even more. Audio effects like delay, reverb, frequency filters, etc. can give instrumental and vocal parts an added touch. I also introduce “automation”, software programming that adjusts or manipulates various parameters automatically. Students can program one part to build in volume while another gets softer, alter the amount of an audio effect… the possibilities are endless. Automation allows creative parameters to be programmed, freeing the student from having to manually do this each time their work is played.
PUTTING IT ALL TOGETHER: SONG FORM
After the basics of melody and harmony are covered, song form is next. Simply put, song form is the journey the song takes the listener through. Here are a few ways to organize the music to achieve this:
Traditional pop components such as Chorus, Verse, Bridge, Intro, Outro, etc.
Alternate structures, such as AABA, ABA, 12-bar blues, etc.
Through composed form (no sections necessarily repeat, such as ABCDE….)
With pop song form, I clarify what each component is, first explaining the role or function of each component (What purpose does a chorus serve?), then describing the characteristics of each component (What makes a chorus a chorus?). A nice online resource that breaks down the key components of song form is www.songstuff.com/song-writing/article/song_building_blocks. After defining these components, we listen to examples of songs and identify these components in context.
FINDING INSPIRATION
Simply saying, “OK, I’m going to write a song” is easier said than done! It can be challenging for students to know where to begin. I talk about sources for inspiration: compelling literary works, personal life experiences, historical events, paintings or other non-musical works of art, or photographs. Non-musical sources can be a great way to trigger a mood or sentiment, followed by deciding how to interpret those sentiments musically. Favorite artists or songs can help spark ideas of how they might create one of their own. Again, the goal is to take the listener on a journey.
CONCLUSION
Everything here is a broad scope of what I do - you will learn a vast amount through the process of connecting with others, working with your students and diving into the three installments of the articles and other resources I have. It is my hope that the articles have sparked an interest and have been helpful in getting you thinking about a digital music program at your school. The rewards have been just as gratifying for me as a teacher as they have been for my students. Happy exploring!

Francisco Dean is in his 10th year as a member of the Lab School faculty and 23rd year overall teaching. He holds a Bachelor’s Degree in Music Education from Southwest Texas State University and a Masters in Jazz Studies from Indiana University. At the Lab School, he heads the high school jazz ensemble and music technology course offerings, which include two levels of digital music composition as well as a class for studio recording and mixing. You can reach out to him at [email protected].
Banner/Header Photo Credit: University of Chicago Lab School student, Odysseas Nikas